
CompTIA A+ Prep: Installing and Configuring PC Expansion Cards
Expansion cards are basically external hardware that can be attached to expansion slots present on a PC’s motherboard. The latter is capable of hosting a number of expansion cards in order to allow the computer to perform better with more functionalities. Slots are specific for each category of expansion cards. Their knowledge and understanding are beneficial for CompTIA A+ Certification Training. A user should always keep in mind that they need to plug out every power supply from their computer. They should also attach the cards with the utmost care. With that being said, here are the types:
Sound Cards
These are important in order to power a computer system with the functionality of sound. Most PCs have built-in sound cards, but some users attach more advanced cards or need to replaced malfunctioning ones. Many cards entail a special guideline which a user needs to always comply with.
Sound cards are installed in PCI slots and before everything, power cable should be unplugged. A user needs to check for an empty slot and then, attach the card by tightening its ends with a screwdriver. Next step is to turn on the PC and insert the disk of the sound card. Install the driver present on the disk.
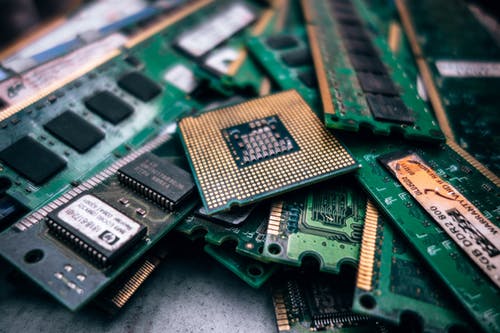
Video Cards
They are simply called graphics cards and are usually large in size that they take a lot of space. This is because they have a fan attached which prevents the card from heating up quickly. So, the fan acts as a cooling system apart from the PC’s own.
In order to install, a user has to remove old drivers by going to the Device manager and uninstall the drivers added. The display may get blurry. Unplug the computer from the power grid. Unscrew the PC cover and search for the PCI-Express slots. The old card should be taken out and a new attached to it. Run the PC in order to configure the card.
Network Cards
Basically, the primary cards which allow for internet connectivity. Many motherboards have built-in cards but in a case where a user needs to replace the card, they would require to put a new one and hence, learn to do so. A suitable network card can be found in any computer hardware store and usually, manufacturers provide complete information about a recommended network card.
One has to make sure there is no power supply, and the jumpers should be checked as well. Many cards just simply plug and play types, and in that case, there is no need for manual configuration. A user should connect the card gently and avoid putting pressure. Afterward, putting the wires in the main grid and switching on the PC would allow for configuration of the card.
USB Cards
They are pretty easy to install, and one simply has to turn off the computer and open up its case. It should be kept in mind that the power supply should be cut during this operation. Then, one simply should look for USB cards location. Attach one and then start your computer. The computer would allow for configuration using the device manager menu.
Storage Cards
This process entails some level of difficulty, so it is important to be very careful in this regard. Storage cards are usually flash cards, SD cards, and multimedia cards. One requires a computer, memory card, memory card reader and an empty slot in order to configure.
First of all, a user requires to check the memory card by putting it into some other device, ensure its functionality and learn about its capacity. Next is to insert in a computer and format the card. Many cards get formatted with FAT file system. One can do so by simply putting into the card reader. The format option would prompt, and so a user should follow up.
The computer’s operating system would automatically prompt the configuration settings. Once configuration settings are carried out, a user should wait for a while. The card has to be removed once the configuration is done and the drive should also be turned off. Next step is to look for a memory slot and insert the memory card there.
Wireless Cards
Wireless or cellular cards can be the easiest to configure. In order to install one, the PC should be switched off and power should be cut. Next step is to remove the cover of the PC using screws. Then the user should search for an empty PCI slot. Once it is found, the card should be attached safely. Now it is required to put the cover back on the PC and switch it on. Once it is on, the PC would automatically recognize the hardware and enable for the configuration.
Now the user needs to go to the Control panel, go into Network settings and then, wireless network connection. The properties there should be clicked and there a user needs to search for the wireless network tab. Next step is to search for the wires networking name and then click the option of configuration. A user can also adjust the network security settings and enter a key written on the wireless router.
Riser Cards
Expansion slots like APG or PCI are compatible with Riser cards. Then simply, a user needs to cut off all power supply, open the PC case and then head to the PCI slot. Attach the card carefully and put all screws back in place. Now it is required to turn on the PC and then, the drivers would be configured automatically.
The above-mentioned expansion cards are very basic and fundamental to learn for everyone taking CompTIA A+ online training. There are also other types which include:
- Modern Cards
- Video Capture Cards
- TC Tuner Cards
- Firewire Cards
- Serial & Parallel Cards
An individual can further learn about these expansion cards through CompTIA A+ courses on this platform. These courses are developed in a way to allow a student to grasp comprehensive information and prepare for their certification.